Image Map
Showing posts with label Writing. Show all posts

Thursday, October 23, 2014

We Love Our Halloween Witches!

Thanks to Joey Udovich at Create, Teach and Share my class was able to make these wonderful "Witch Crafts"! I must tell you that my students loved making them. Originally, I was going to send copies of the witch to print in color, and let my students cut it out. However, I changed my mind and I'm so happy!  My students truly enjoyed creating their own unique witch! In addition, they loved writing their Halloween story to go with it.

Joey provides everything you need for this product in her store. It even came with ready made prompts for the students to use and create their Halloween stories. If you are interested in creating your own "Witch Crafts" you can click here!

Here's some of our witches from our hallway!


If you haven't liked Joey's Facebook page you should do that too. You can click here for that! She has great ideas for upper elementary teachers!

Thank you so much!

Thursday, October 17, 2013

What I'm Reading!

Well, I always seem to be reading something these days! My goal is to make my students better readers and writers, and the best way I know how to do it is to educate myself! I love what I have been learning and I'm excited to keep learning as much as I can! Here are some of the books that I am reading or I've just ordered to read.

The above book I learned about this September at the Daily 5 conference in Denver. This book is a way to get rid of the regular spelling routines. Per the blurb on Amazon: "Cindy Marten responds to the demand for "direct, systematic, and explicit phonics and spelling instruction" that goes way beyond what to teach - she addresses the questions of how, when, and why spelling should be taught. More important, she situates spelling within the contexts of real writing and the individual learner's needs."

I've only just begun reading this, but so far it's very interesting!

I'm pretty excited about this book! I just recently ordered it and hope to receive it tomorrow. I've read the 1st chapter online and I'm excited to read what Debbie Miller has to say about ensuring that kids have support in the classroom when reading independently. I have been conferring with my kids daily with a para in my room and my kids have made some great improvements. I really hope to learn more in this book.

This is another book that was recommended to me at the Daily 5 conference I have the book, and it is on my reading list! Writing is one area I don't feel as strong in as I do reading. I can't wait to read this and learn more about read world writing!

This book was just released yesterday, and I haven't received it yet, but I've been reading about it on the blog, "The Nerdy Book Club". I'm excited about reading this book, because close reading is such a huge component to the CCSS. I have been working on close reading with my students and I hope this book will enhance my students learning and understanding. In addition, I hope it will enhance my teaching!

You and your students will fall for close reading. In Falling in Love with Close Reading, Christopher Lehman and Kate Roberts show us that it can be rigorous, meaningful, and joyous. You'll empower students to not only analyze texts but to admire the craft of a beloved book, study favorite songs and videogames, and challenge peers in evidence-based discussions.

Last but not least this is the book I'm SUPER excited to read! The bummer part is, the book has not been released. It was originally going to be released in October, but now it's not until November. If you've read "The Book Whisper" by Donalyn Miller, then you'll want to read her new book! I'm so excited to find out what Donalyn has to say about building lifelong reading habits in the classroom!

I've got quite a bit on my reading list, but it will all be worth it!!


Sunday, October 13, 2013

Celebrating!

I am linking up with Ruth Ayres writes to share a celebration! Every Saturday we will link up on on our blogs to share some kind of Celebration that you want to talk about in the classroom. It can be anything! I was trying to think of something fun that I can celebrate.

Discover. Play. Build.
So this week I am celebrating my class in working on their Mystery Stories. We are wrapping them up this coming week and we are doing our writing celebration this coming Thursday. My kids still have some work to do with editing, but we are on the right track! They have been working hard and I know our writing celebration will put them in the right frame of mind to continue down this writing path!!

Monday, July 22, 2013

Children's Illustrated Book

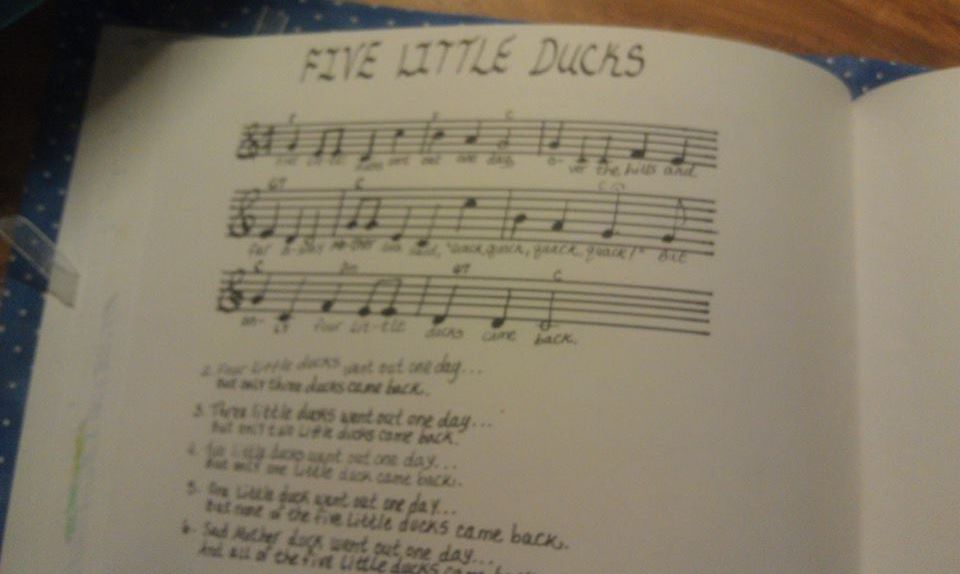
I was looking through some of my things and I ran into something I made in my undergrad. This book was made in my Music Methods class. The idea was to take a book that had music with it, and convert it into a picture book for children. The kids in your class can create a book in class using this same idea! Since I found it, I thought I'd share it!! Here are the pictures of the book. Note the cover is made from cardboard and covered with fabric. The pages are legal size and they are stitched into the book.


Hope you enjoy!!

Sunday, July 14, 2013

Decorative Clipboards

I have had a busy weekend...refabbing my not too pretty clipboards! I got the idea from Pinterest and another blogger. The original blog was my inspiration, Literacy Spark. Thanks so much for the idea!!

So I went out to my classroom and I picked up 20 of my clipboards from my classroom. My husband and my son thought I was crazy when I told them what I was about to do, but they thought it was a cool idea. The next day I was off to Hobby Lobby to buy some supplies. I bought scrapbook paper, Exacto Knife, and Designed Scissors. I also needed Mod Podge, but I had some of that on hand. Once I had this I was ready to get started!! Yay!

Here is a picture of some of the clipboards before I started.


The next step was to create a template around the clipping mechanism on the clipboard. Let me tell you it was a pain, and I had to enlist the help from my husband! Once we got that under control I traced the template for the top half of my clipboards. I knew that I wanted two color designs to create a more custom look. After I had the template cut out, I checked it on the board to find out if it fit, and to see if I needed to adjust it anymore. Please make sure you do this, as I usually had to adjust it a bit each time. Once I was comfortable with the fit, I then used a paintbrush and put a coat of Mod Podge on the top half of the clipboard and also on the back of my cut scrapbook paper. Next, I carefully laid the scrapbook paper on the top half of the clipboard, lining it up as I went. I then smoothed out the paper and got out any bubbles using a ruler and a dish towel. I set it off to the side and allowed it to dry. I would wait at least 30 minutes. Below is a picture of what they looked like with half of a design.


Once I got the scrapbook paper and Mod Podge applied to the tops of my clipboards, I was now ready for the bottom half. Next I had to decide the scrapbook paper that I wanted to put with these. I once again had to create a template for the bottom half. I then cut out the scrapbook paper for the bottom half and did the same process as I did above by applying the Mod Podge to the clipboard and to the back of the scrapbook paper. Note: you may want to cut the top half with designer scissors, so you don't have to worry about getting the cut exactly straight. I remembered on some, but forgot on others. Be sure and get all the bubbles out and wipe of any excess Mod Podge.  Now, please set these off to the side and allow to dry again for at least 30 minutes. I waited a bit longer, because we were out running errands. You may also need to take an Exacto Knife and trim the edges of the clipboard. I had to do it on several boards, no matter how good I thought my cuts were going to be.

Once they were dry it was now time to add a layer of Mod Podge to the top of the scrapbook paper. So again I took my paintbrush and I painted on the Mod Podge to the top of the entire clipboard. I let it dry, and then I did the process one more time.


Once the clipboards were completely dry, I was all set and my new refabbed clipboards were ready!! I am so happy with the clipboards as they are bright and happy and will fit into my bright classroom.


Completed Clipboards!
Once I finished my clipboards I ran into another site that had some great ideas on this topic. One thing they suggested to do was to take the clipping hardware off the boards first. They also suggested painting both sides first. I left the backs of my clipboards as is, but paint on the back might have been a good thing to hide the ugly brown. I am happy with what I did, but click here if you want to see the other examples.

I had a ton of fun, but let me tell you this isn't a quick project. However, if you are willing to put in the time you will create some fun clipboards for your organized classroom!

So do you have any ideas to share about other cool ideas in your classroom??

Tammy


Related Posts Plugin for WordPress, Blogger...